


My Latest Excursion into the Land of Lego
Build Your Own Lego Typewriter (I'm sorry this is not about Trump, Musk, the destruction of our government, and the start of a golden era for the United States. … Other life is still going on).

A Minimally Operational Model of A Real Mechanical Typewriter
If I were a true Lego enthusiast, you know the type, if you came to the house of a living breathing “Leogoist,” they would show you every new Lego model they built, and if you continued your good fortune, they would continue by showing you the older models they built. Still lucky? They would then go into the plans for future Lego building projects. God Bless the wife of this Lego enthusiast because we know that this kind of devotion can get very destructive to a relationship.
Also, you cannot expect too much criticism of Lego constructions from this type of enthusiast. I am not that type of enthusiast, and after building the typewriter with my daughter, I came away feeling a kind of “what’s the big deal?” feeling. I felt this way because I really thought the model should be “more” real than it was. Likewise, I thought it should actually type something.
The Typewriter

This is the box that the typewriter comes in. The photo is pretty cool, and I think the box is what attracted me to the kit when I saw the box.
I spent many years with various manual typewriters similar to the Lego model. Manual typewriters used metal parts to create the mechanisms that together carried out the functions of the manual typewriter.
Each of the keys of a manual typewriter is connected to several rods and finally to a type hammer. The type hammer has a single letter corresponding to the key that actuates it. When a type hammer is actuated, it lifts, hitting a ribbon. In turn, the type hammer hitting the ribbon will leave a character on a piece of paper that is held in place by a roller. The purpose of the roller is twofold. The first purpose is to hold a sheet of paper in place, and the second is to advance the paper to the next line when the previous line has been completed. The roller that holds the paper can also be used to reposition the paper when necessary. Besides rods, the typewriter also uses gears to create the actions of its parts.
We had a couple of typewriters at home, and one of these became “my” typewriter. This was the typewriter where I learned to type on a typewriter. Since I was young, I learned to type by way of a technique we called “hunt and peck.” Hunting and pecking involves finding the letter to be typed and then pressing the key for the letter. Little did I know I would be using a typewriter of one kind or another for the rest of my life.
Learning to type, by “hunting and pecking,” is a slow process. It wasn’t until I worked in a neighborhood pharmacy and watched the pharmacists use a typewriter to prepare prescription labels. I realized that hunting and pecking could be a fairly fast means to type. Pharmacists typed quickly enough to prepare a label in a couple of minutes. During busy times in the pharmacy, this was vital. Watching this rapid typing, I realized that hunting and pecking could be a good way to type. Much later, I learned a method of typing named “touch typing,” whereby one learns the position of all the letters on a keyboard, which eliminates the need to hunt for a key.
After so many years of using typewriter keyboards to record text, typing has become second nature to me.
The Lego Typewriter Kit
As Lego kits go, this was not a beginner’s kit, and it also was not as complex as some that I have built. The kit consisted of 2079 pieces. At the time I am writing this, the kit is difficult to find. The price for the kit was originally $250. At present, you can find kits for $500, but few are available at the original price.
I build many of my kits with my daughter, and this was one I started and finished with her. The 2079 parts were spread between twelve bags, each containing parts for different assemblies.
Due to schedules, my daughter and I took a while to finish this kit. I think it would be possible to build the kit in a week or two from start to finish, working every day.
Here is a photo of myself and my daughter with the completed typewriter.

Does It Work?
Isn’t this what you wanted to know? Without any hesitation, I will tell you that the typewriter is not a working model of a real typewriter. It would be better to call a simulation of a typewriter or even a toy typewriter. It does have some of the movements and sounds that old typewriters made.
Nevertheless, this Lego model is closer to a toy than a real typewriter. Pressing a key causes a character hammer to lift toward the paper, and when pressure is released from the key, it falls back onto the key rest. No key hammer has a true type face, so the typewriter can’t actually type anything.
When typing, the carriage moves in the same way it did in a real manual typewriter. The carriage can also be reset to its original position with a handle on the left.
Building the Typewriter
Like most Lego kits, the instructions were clear and straightforward. Lego has perfected the art of creating assembly instructions, and given the complexity of this kit, the clear instructions were welcome.
As a visual learner, it is important to me that the diagrams be clear and easy to understand. Understanding these instructions involves being able to identify the necessary parts for an assembly step.
Following the identification of the necessary parts for a step, the next step will be to understand how the parts are to be assembled. Sometimes this understanding required how to assemble parts into a subassembly. Other times, instructions are given on the way to assemble a subassembly into the assembly that has been constructed. Still, other times require an understanding of how subassemblies are created and then how that subassembly will be attached to a completed assembly.
Sometimes the diagrams that “explain” how an assembly step is carried out are difficult to interpret, and mistakes can be made while assembling a kit. This is normal and can be corrected. Some problems arise when a sub-assembly is attached to the rear of the main assembly and the diagram does not clearly show where or even how the sub-assembly is attached. My daughter seems to have little problem with understanding the diagrams that are less clear to me.
Subassemblies
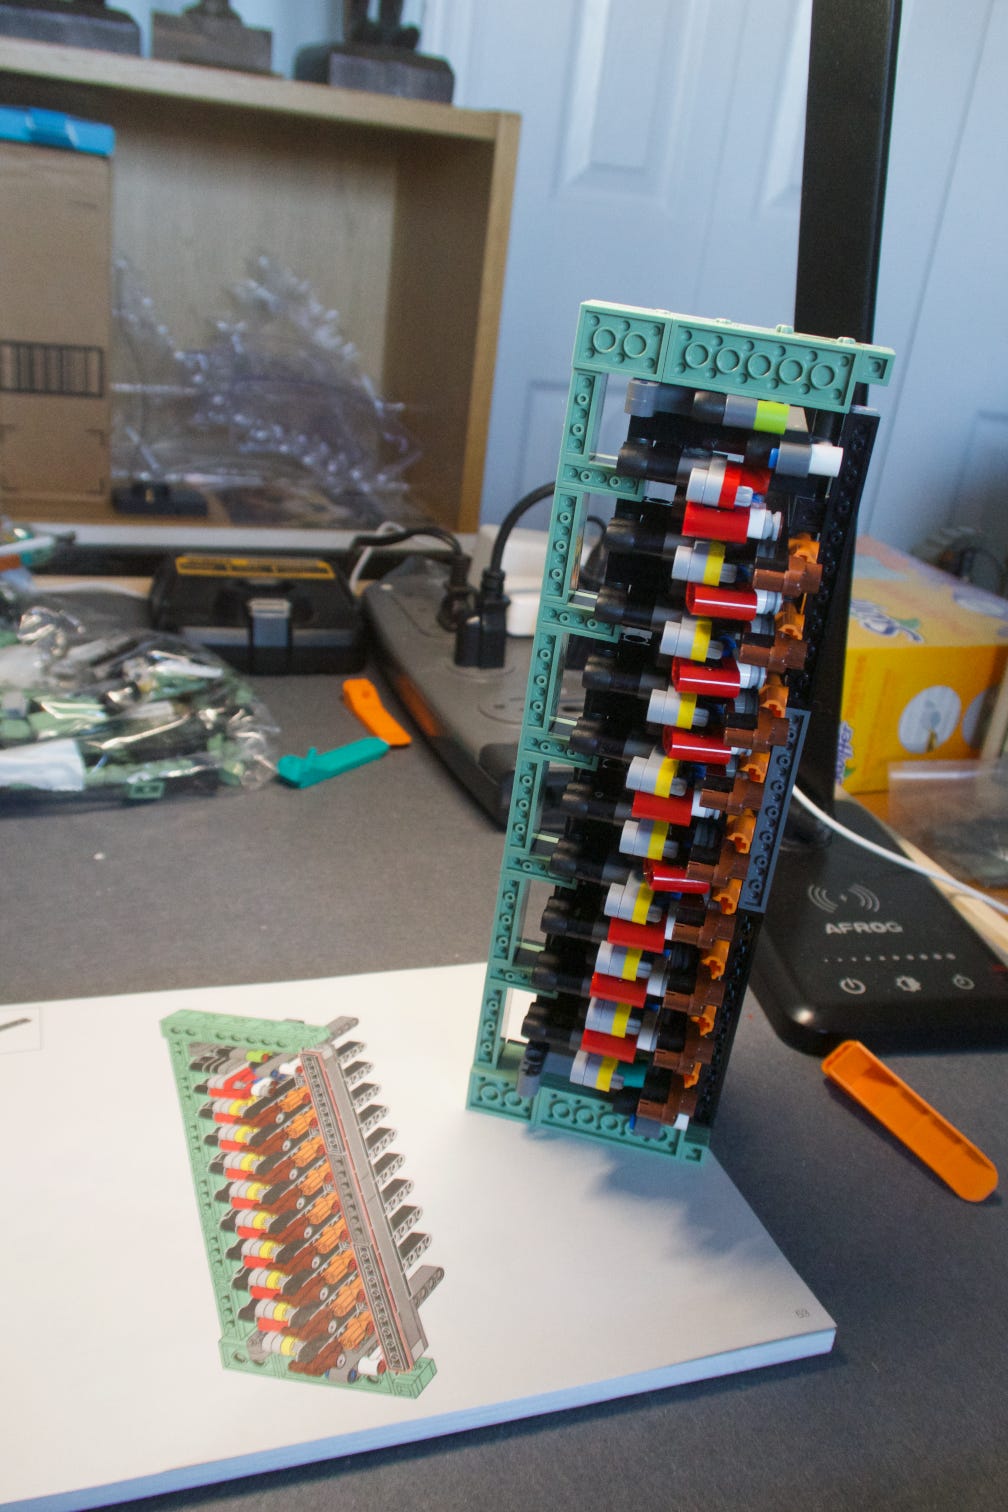
This photo shows part of the key actuator subassembly from the assembly instructions page that corresponds to it.
A closeup of the assembly diagram will give a better idea of the way these actuators function.
The keys push down on the stacked pieces on the left, and the motion is transferred through the stack to the connectors to the long black bar, which will eventually result in the type hammer being actuated.


This photo shows the type hammer actuator bars before they were used in the construction of the typewriter. There is a single bar for each key in a row.
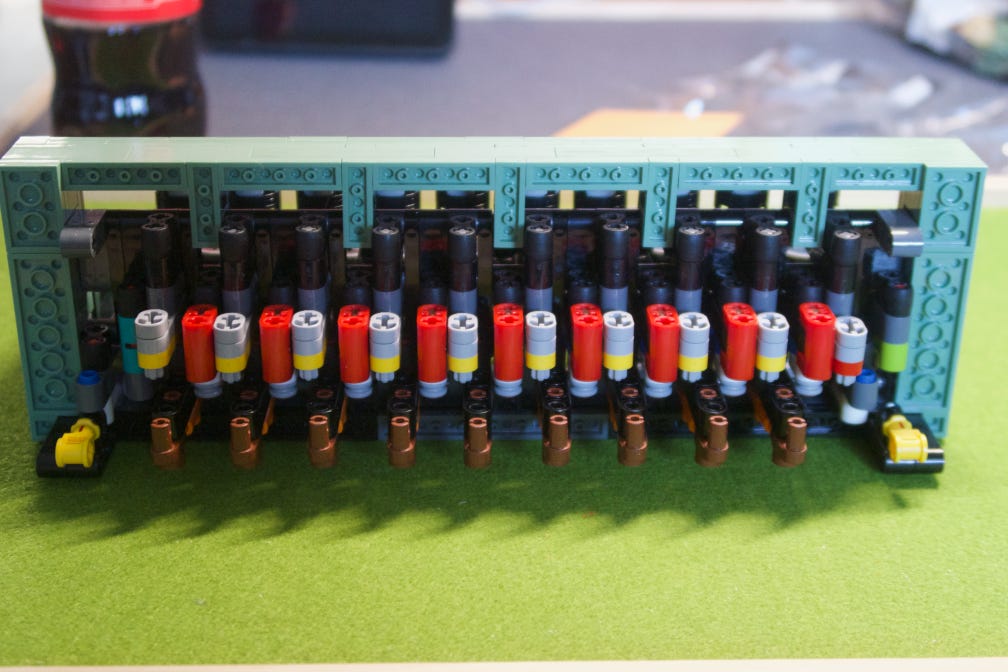
The brown connectors attach to the long actuator bars.

This photo, with more of the typewriter together, shows the inside of the typewriter mechanism, where the hammer carriage is located.

This is the assembled-type hammer that will move from the left to the right as keys are pressed. The hammer hits the type hammer and then moves to the right. This view is looking at the typewriter from the rear of the assembly. The next photo shows a front view of the typewriter from the keys toward the rear of the typewriter.

At this point during the assembly, we had 3 bags of parts to finish out of the twelve we began with. A couple of months went by until my daughter was able to return, but we eventually finished the typewriter.
My Conclusion
Was it worth building? Undoubtedly, it was worth it. The satisfaction, at least for me, was more about seeing the engineering that went into the typewriter. The ways the Lego designers and engineers devised the typewriter were quite impressive, and that aspect in itself was a marvel to behold. It is another testament to what can be accomplished with Legos. The constructions that can be produced from Lego parts are very astonishing. I was less impressed with the final result because it is not truly a working typewriter. If that is what you are expecting, you may be disappointed.
On the other hand, the very nature of the kit and what it does is very impressive.
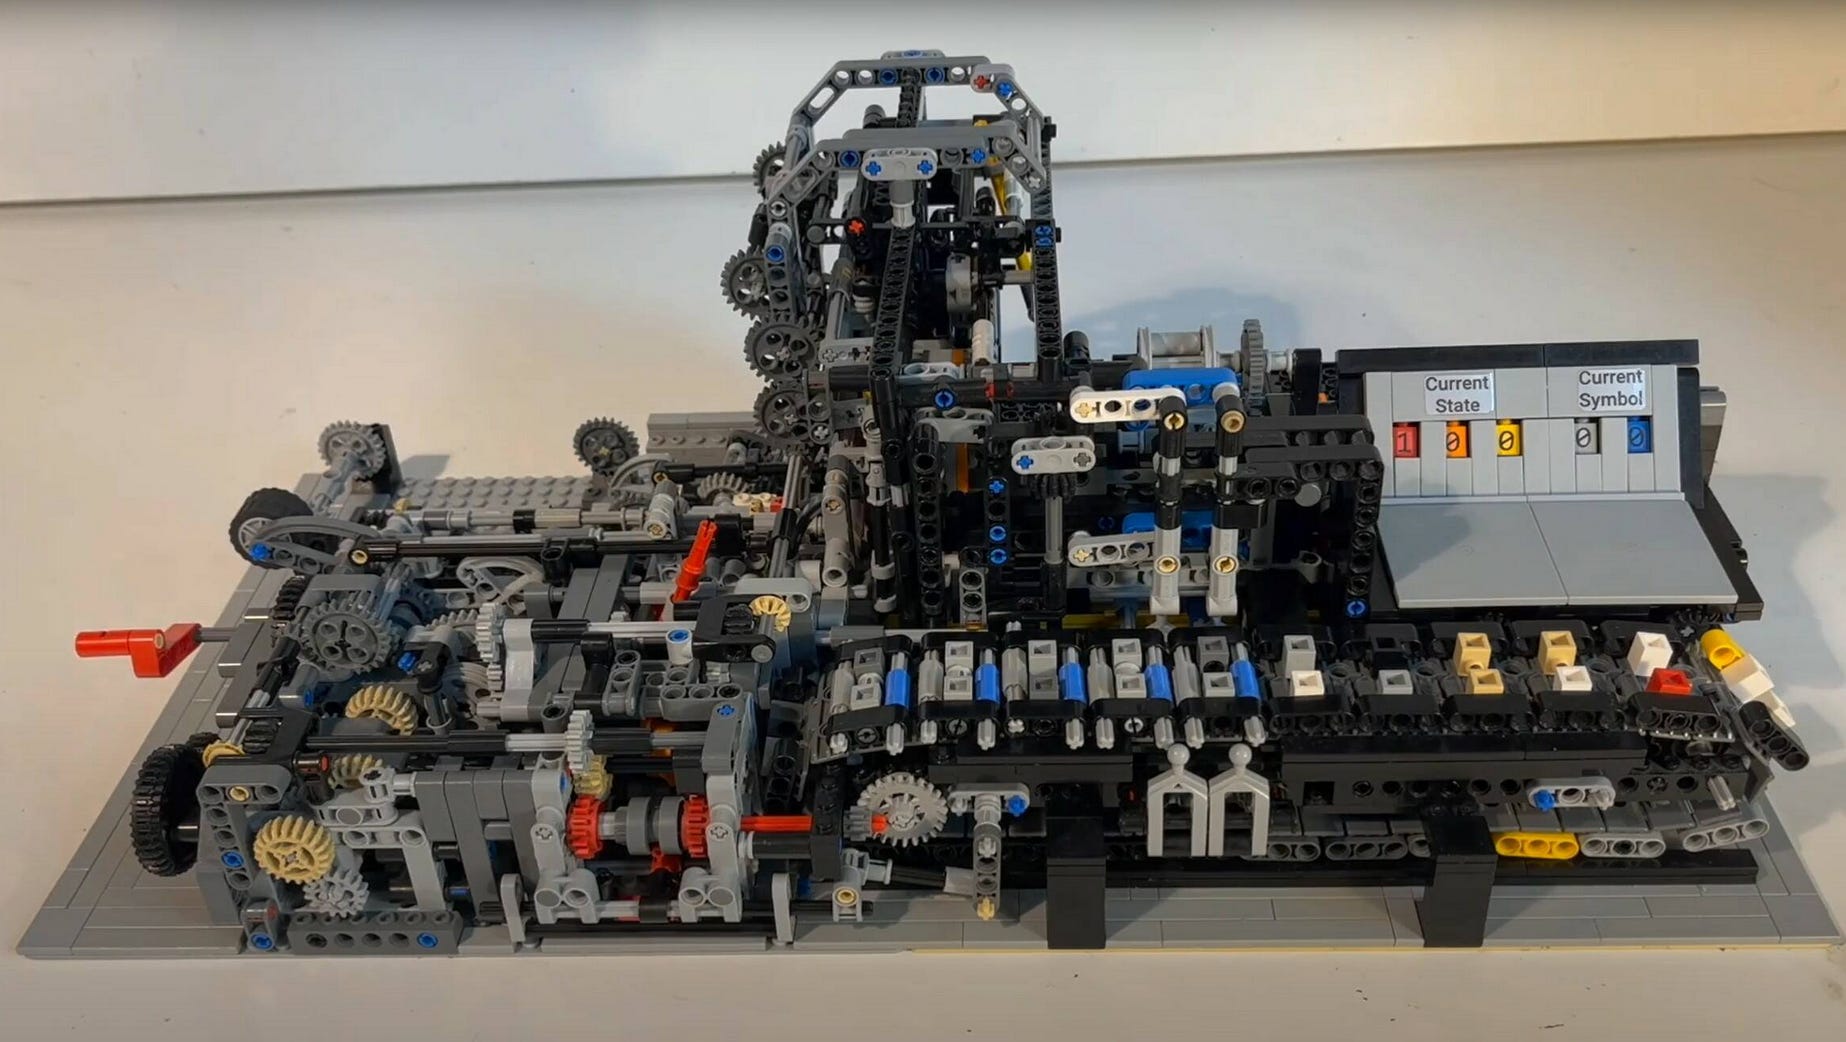
While my daughter and I were assembling this kit, I saw a video demonstration of a Turing Machine made from LEGO parts. A Turing Machine is a mathematical model of a programmable computer. The Turing machine is a mechanical device that was built using Legos. This project was extremely impressive. Having built the typewriter and seen the Turing Machine, I may challenge myself by building my own version of the Turing Machine.
Another example of a Lego-built computing mechanism is the Difference Calculator, as proposed and designed by Charles Babbage. Here is a photo of the Lego working Lego Difference Engine Model. This is another example of an early calculating engine, as they were called.

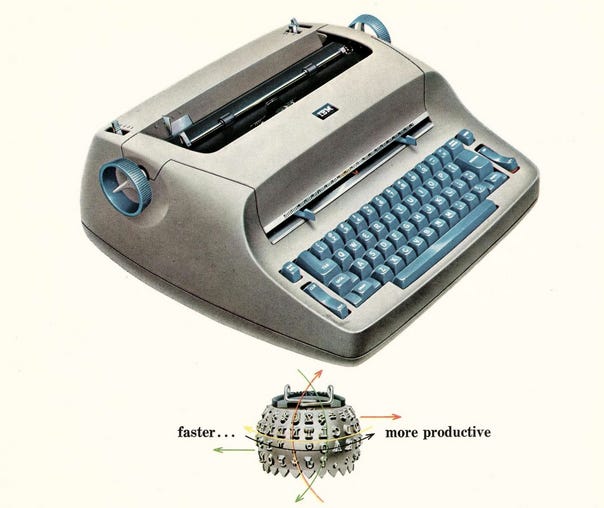
The Lego typewriter kit has been discontinued, but it can still be found. I don’t know what feedback the Lego company was given about the typewriter, but I think it is conceivable that they may produce another version at some point. Perhaps, it won’t be a traditional typewriter. I would like to see the Lego engineers produce a typewriter with a type ball like the type ball used in the IBM Selectric Typewriter.
Closing Comments
I hope you enjoyed reading this article. I enjoyed writing it. If you did like it, please leave a comment. If you can clap for it, please do so. Even better, please subscribe to this newsletter. I also publish on Vocal.
About Subscribing: Debunk Will Always be Free. You will never have to pay for subscribing to Debunk and also to anything that I write. I will not market to you and use your dits without your permission. The very fact that you have subscribed is a tremendous showing of support for which I am appreciative. If on the other hand if you feel you would like to do something more, please donate to support my work. That of course will be greatly appreciated also. Thanks again for reading.
You can reach me at therenguy@gmail.com.
NOTE Regarding the Use of AI to Write: My writing is done without the use of any AI Writer.